Pages

background

Thursday, January 26, 2012

Love Blocks

A while back, when Valentine's Day seemed like it would never come, I found a tutorial for these blocks on the Oopsey Daisy Blog. You may view the original tutorial with pictures here, or keep reading to see how I did it.

In order to make this, you will need:
A 2x4 block of wood (cut into four pieces)
Spray paint
Scrapbook paper and Cardstock
Ribbon
Mod Podge
Glue Gun

I let Adam have a little fun with this one and cut the 2x4 into four pieces: one 6in block, two 7in blocks, and one 8in block. I gave each piece of wood a few coats of black spray paint and sanded the sides.

To make the letters, I picked a font, printed it out, and traced each letter onto cardstock. Since I don't have any fancy machine for cutting, this is what I resorted to. I cut the letters from the cardstock and they were ready to go.

Next, I traced each piece of wood onto scrapbook paper and cut them out. Using Mod Podge, I put the different patterned paper onto each block of wood. Another coat of Mod Podge was used to adhere the letters, and a final coat of Mod Podge went on top.

When that completely dried, I added the ribbon using a glue gun. I followed the tips from Oopsey Daisy and only put ribbon around the sides and top of each block so they would stand nicely. Simple as that! Now you can make one for every holiday.


Variations:
-any colors
-any paper
-any letters

Happy Crafting!

Friday, January 6, 2012

Letter Photo Art

I found a really cool tutorial on the Shanty-2-Chic blog, and couldn't wait to try it! With Christmas right around the corner(when I came across this), I decided to whip up a few for gifts. They were a big hit, and I may even have to make my mom a "Laundry" one.


In order to make this, you will need:
A 2x10 piece of wood
4x6 pictures frames (I got mine at Dollar Tree)
Spray paint in the colors of your choosing
Hot glue gun
Letter pictures

First, I picked my letters be clicking HERE. There are a ton of letters to choose from, and they are absolutely free!

Next, I spray painted both the wood and the picture frames, both needed several coats. Once they were completely dry, I put the pictures in the frames and pulled the support piece off the backing of frame. I then determined the placing of each frame on the wood. When I got it just right, I began gluing. I used a hot glue gun, so it wasn't long before the glue dried and I could see my finished product.


Variations:
- For longer names/words, you may want to use 3x5 frames and a smaller piece of wood.
- A thinner piece of would should be used if you would like to hang you letter art on a wall.

Happy Crafting!

Wednesday, January 4, 2012

2012 Craft Goals

In 2011, I spent a lot of time on pinterest, adding craft projects to my DIY board. Some of these crafts I tried, some I would still love to try, and some, I know I will never take the time to complete. With that being said, I have compiled a list of crafts that are a must to complete in 2012.


#1: Vinyl Letters on Blocks of Wood- I have been wanting to make at LEAST one of these for months now. Every time I see them, I fall in love all over again. A saying for every holiday would be fabulous, but this year, I'll settle for just one. 


#2: Chalkboard- would be so fun to write cute little messages on! 


#3: Handmade Flowers- For hair clips, headbands, necklaces, or to add the perfect touch to a craft project, I really need to learn how to make some flowers. Most of all, I would love to make a white flower for my hair for the wedding reception. 


#4: Frame Tray- this is adorable for a coffee table. A smaller one would also be nice to set my perfumes on. Frame, fabric, and drawer handles.


#5: Beaded Chandelier- it would be fabulous to have a real light in there, but I would settle for one just for decoration. This one is beautiful!


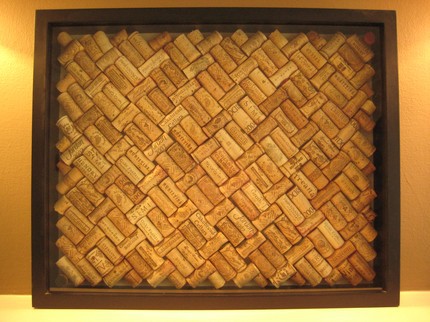
#6: Wine Cork Creation- Wreath, cork letters, or just a bunch of corks in a frame. Let the drinking begin!


#7: A craft with silverware (for the kitchen)


AND*** FOR THE WEDDING-

#1: Finish favors
#2: Card Box
#3: Letter M
#4: "And they lived happily ever after" sign
#5: Hangers
#6: day-of sweatshirt
...the list just keeps growing


I can't wait to get these crafts started. BRING IT ON!
What are your crafting goals for 2012?

Happy Crafting!


Thursday, December 22, 2011

Ribbon Trees

Oh Pinterest, how I love thee. I saw these ribbon trees from Whipper Berry about a week ago, and just knew I needed to make some. I headed out to the store yesterday to get the supplies, and finished my first tree today.


In order to make this, you will need:
Styrofoam cones
Ribbon (any color you'd like)
Sewing Pins


I first cut ribbon into 4inch pieces. Then, I simply looped the ribbon and attached each piece with a sewing pin, starting at the bottom of the cone. I continued this until the tree was covered, ranging the pieces of ribbon from 4 inches(bottom) to 2 inches(top). When I reached the top, I added two loops to the top to make the point of the tree.


This project was very easy and only took about 2 hours altogether. These tree would be great for anyone to make, even if you aren't very crafty. I absolutely LOVEEE my first tree, and can't wait to make more!!


Variations:
-Using paper mache cones will be less expensive, but you will need to use hot glue to secure the ribbon instead of pins.
- Switch up the colors for a more unique look.
- You can make many different trees in many different sizes to display in your home.


Happy Crafting!

Saturday, December 3, 2011

Ornament Wreath

I fell in love with this ornament wreath when I saw it on Fingerprints on the Fridge blog. I followed this tutorial and ended up with this:


This project was much easier than the first project I decided to tackle, and didn't take very long at all.

In order to make this, you will need:
1 wire hanger
hot glue gun and glue
ornaments (approximately 60 large and 30 small)
ribbon


Start by shaping the wire hanger into a circle. Then, hot glue all the caps to the ornaments so they don't fall off later. When you are ready, untwist the ends of the hanger and begin stringing the ornaments, alternating colors and ornament placement as desired. Use the smaller ornaments to fill in the gaps left by the big ornaments. Once all your ornaments are placed, retwist the wire ends and form a hook. Use ribbon to form a bow and cover the hook. 


I chose to hang mine over a mirror in the living room. 


Please note, it is not recommended to hang this on an outside door.

Variations:
- You may add your bow to the wreath in the area of your choosing. It may look nice on the bottom and hanging down as opposed to on top.
- I chose to put ribbon throughout the wreath to cover up any areas where the wire was showing, this is optional.
- Use any colors you like! It may be fun to make a black and orange one for Halloween. It might also look cool with all one color!

Happy Crafting!


Monday, October 31, 2011

Wedding Vows

I saw this on Etsy, and immediately fell in love. Of course I didn't want to spend the $100+ to purchase it, so I was determined to find my own way of doing it. I came across this tutorial, tweaked it a little, and this is how it turned out.


For anyone who is planning to do this, I must warn you it is a  L O N G  process that requires a lot of patience. 

In order to make this, you will need:
canvas (12"x24")
contact paper
x-acto knife
spray paint
iron

First, you will need to create a design of how you want the words to be laid out and what fonts you would like. I did this on Photoshop to make sure the sizes would be correct when I printed it. Once you have printed your design, the fun begins! You will need to trace all words onto contact paper, and cut them out using an x-acto knife(some fonts I found easier to cut with scissors).


Next, lay out the letters as you would like them on your canvas. Then, peel the backing off the contact paper and stick them to the canvas. The contact paper may not stick perfectly onto the canvas, so I ironed the letters to prevent paint from getting underneath. I placed a paper towel between the canvas and iron so it didn't leave any marks.


Once you are certain none of your letters are pealing off the canvas, you are ready to paint. Continue spraying until you have the desired color. You may need to spray multiple times before you are satisfied. Then let dry.


When your paint is dry, peel the contact paper off to reveal your final product!


Variations:
- If you have a cricut, this project will be much easier. Choose fonts from there to avoid tracing and cutting.
- If you would like the letters a color other than white, paint the canvas the color of your letters first, then follow the steps above.
- Use any words or quotes you would like to make this project your own


Happy Crafting!